How To Turn Your Broken Skirting Board Into A DIY Job
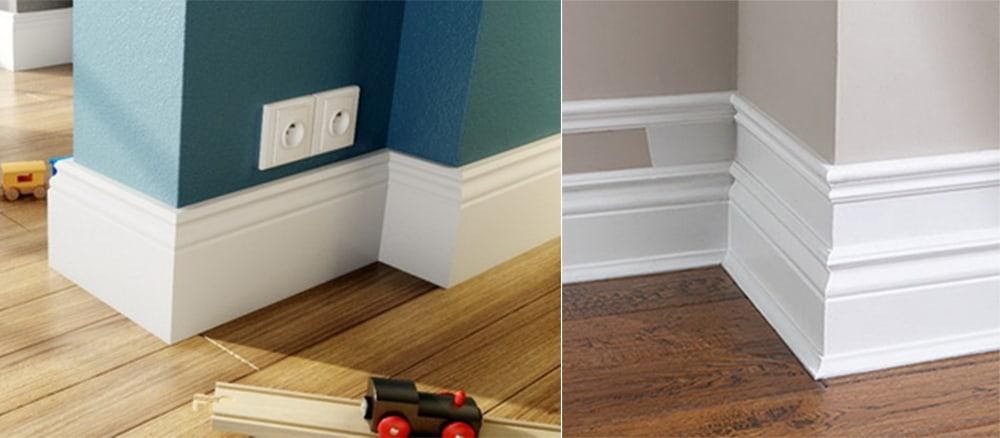
Many people have no idea what a skirting board is or what purpose it serves within a residential or commercial building. To clear things up, let’s take a few steps back. In the architectural sectors, this important piece of a building is a wooden or vinyl board that typically covers the most bottom part of any interior wall.
The main purpose for which it is built is to cover the joint between the surface of the wall and the floor. Plus, it helps to hide any uneven edges that are visible. These can comprise a narrow length of wooden plant that is cut into the side and either nailed, glued, or screwed to the crevice at an angle of 90 degrees. Olden day and traditional design architecture houses use them as a means of added decoration, as they have a pattern on them.
You can even get ones comprised of other materials such as plastic and can be manufactured using an assortment of moldings, find out more about this here. No matter what the shape or size of them, these boards do make a fundamental difference to the entire house, in aesthetics by making things look neat and hiding any inconsistencies, but also as a useful addition to keep walls from being stained, or scratched and children bumping into them or even furniture being put against the walls so that it avoids the surface from getting damaged.
As it is a time consuming and costly endeavor, hiring a professional service to get these installed for you is a wise thing to do, however, if you’re merely replacing them or on a budget, we have a few DIY tips in our guide below for you to get started with this project. Let’s begin with the first step.
Common Types of Skirting Boards
First things first, you need to do your homework to see which one will fit your space the best. there are a few to choose from when purchasing them from a store, below are some of the common ones:
- Ogee
- Chamfered
- Square
- Pencil Round
- Torus
- Ovolo
- Bullnose
And in terms of the materials, they are available in these include Hardwood such as Oak, Bamboo Mahogany. You also get the softwood types which include Fir and Pine, and lastly, you can purchase the most convenient and best ones made of MDF, which are usually already cut for you and primed with a hardened primer.
Next, we look at fitting them.
Fitting Skirting Boards
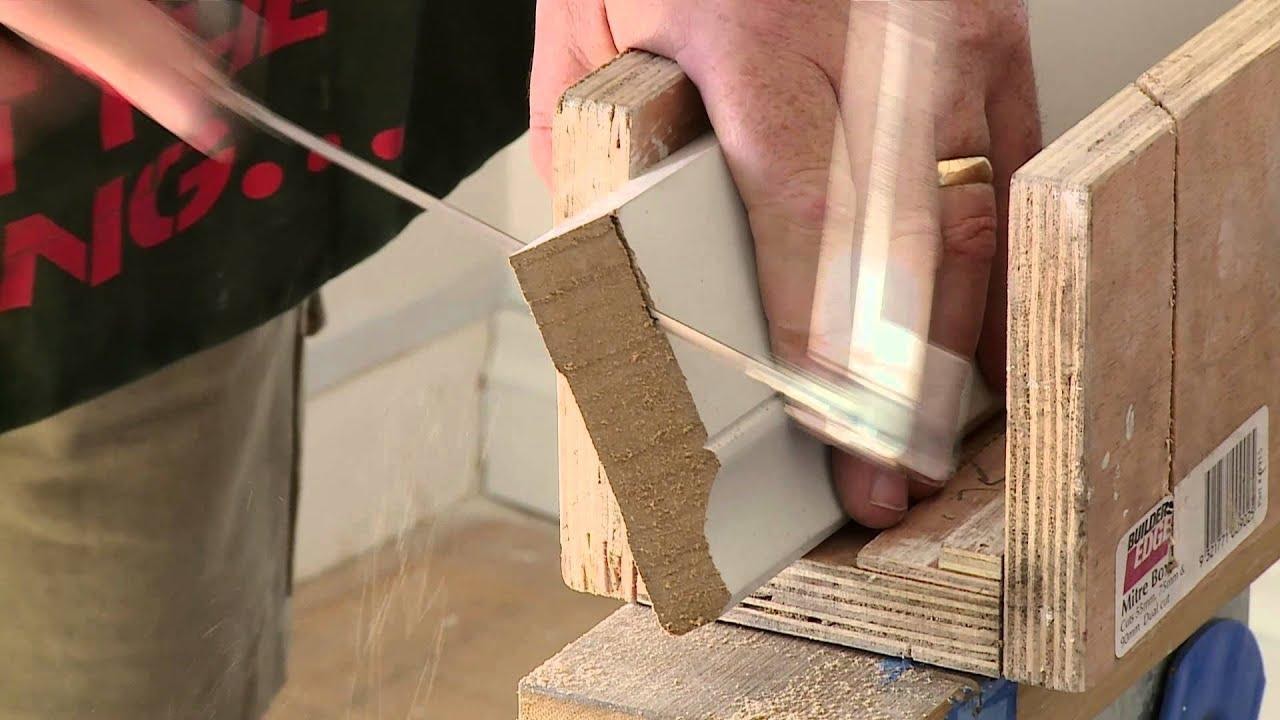
Before you jump into the fitting part, let’s take a look at the tools you will need. To start with making sure you have all of the below:
- A pencil, preferably sharp to draw smooth straight lines
- Tape Measure – for measuring the length and width
- A Chop saw – for cutting the boards
- A drill if your using screws
- A Level – to make sure things are straight
- Wood Glue – if you’re using this to bind the planks, otherwise nails or screw will do
- Nail gun – if you are opting for the MDF types, a nail gun can come in handy and save a lot of trouble with hammering
When you join these pieces, it would typically be at a 90-degree angle, the mitered ones would be on the outside corner and should be cut accordingly.
Once you cut the one plank according to where it will fit, then you should measure and cut the other one, for instance, if you cut the bottom one, then you will cut the top one once the bottom one is placed in position.
When you start you should look for the walls that don’t have scribes, these can come last and when you buy any cheap skirting board from a reputable store, they will give you ones that fit the scribes as well as the lengths of the wall. A lengthening joint is usually needed if the length of one is not enough, this acts as an extra piece for the remaining bits.
Where the skirting corners meet you should cut them at a 45-degree angle. Sometimes in some houses, the walls are not exactly straight, in which case you will need to do some adjusting. Measure, then cut, and then hold the pieces together to see you’ve got the corner angles correctly aligned. If it’s a little bit too much you can either cut them or file them down using a serrated file.
Place your glue on the backside of the board and stick it to the wall making sure it is on the level, and do the same with the rest. This should not be touched for at least a few hours, so leaving overnight is the most advisable thing to do when no one is around the house.
If you’re covering the entirety of a large room, always get someone to help you because the recommended thing to do is for both people to hold it against the wall at both ends to measure, cut, and glue it at the same time so there are no inconsistencies. It can be surprisingly easy to notice when one is out of place, and once it is glued it may be difficult to remove or, if you do get it out you may damage the wall.
Once the glue has dried overnight and you test it to see that it does move and is set, then you can paint over it if needed. The preferable type of paint to use is made specifically for wood, so look for a tin that says wood paint, at the hardware store. If there is no need to paint it, then wipe it down with a damp cloth so there are no dust or wood shavings on it and make sure the work area is also clean and safe from any wood shavings, nails, or screws.
You can be as creative as you want when it comes to painting them, sometimes a bold color at the bottom can make a room look completely different. Enjoy!
fashion-mommy
Welcome to the world of fashion-mommy, a world of fashion, lifestyle, theatre and fun. Enjoy the ride.
You May Also Like

Why Shaving Your Legs Totally Suck

Lindex Styles Winter
